
Blackmagic Cloud Guide: Sync and Share Your Footage
How Blackmagic Cloud works with Black Magic Camera: syncing clips from your phone, sharing projects with editors, and keeping original footage safe while you travel.
Grade Black Magic Camera footage in DaVinci Resolve: importing phone projects, a simple node workflow, matching clips, and exporting a finished look without overcooking it.
Black Magic Camera and DaVinci Resolve were made by the same company for the same reason: to carry professional footage from capture to finished film without changing hands. If you record with the discipline this site teaches, Resolve is where that discipline pays its dividend.
This grading guide gives you a simple, repeatable node workflow for phone footage: organise, balance, match, look, deliver. It assumes the clean files and monitoring habits from our LUTs guide, and the Black Magic Camera homepage links the wider workflow material for creators building the full pipeline.
Grading rewards restraint more than any other post skill. The goal is footage that looks like the day felt, only clearer, matched across every cut, and finished with a look that serves the story instead of showing off the software.
Import the project's clips, confirm Resolve sees the correct frame rate and colour information, and organise bins by scene or day before touching a single slider. Whether clips arrive by cable or through the cloud workflow in our Blackmagic Cloud guide, the rule is identical: tidy media first, creative work second. Ten organised minutes here save an hour of hunting later, especially once a project grows past a single shoot.
Professional results with Black Magic Camera come from repeatable habits rather than lucky clips. Build a small routine around grading in DaVinci Resolve: prepare the phone, confirm your settings, record a short test, review it honestly, and only then start the real take. The routine takes two minutes and removes most of the surprises that ruin otherwise good footage.
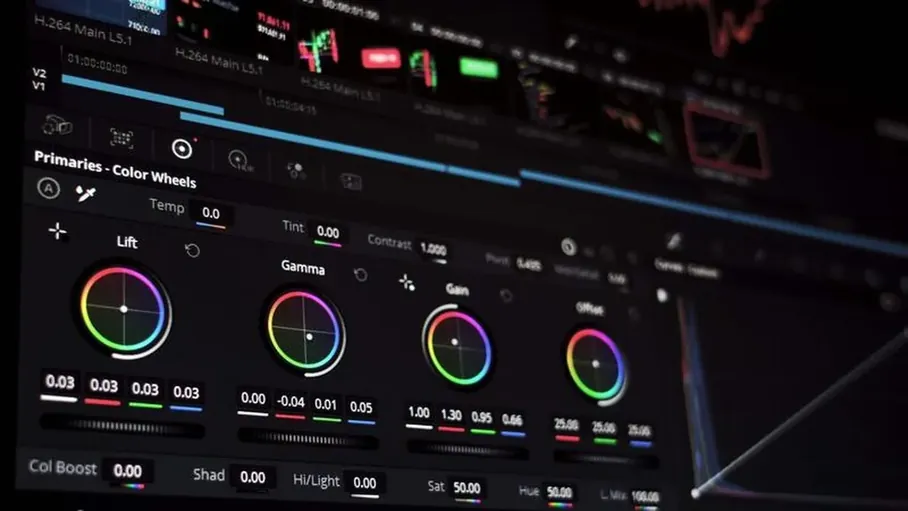
Work in this order: first node for exposure and balance correction, second for contrast and saturation shaping, third for your look, and a final node for output adjustments. Corrections before looks is the entire philosophy; a look applied to unbalanced footage just makes the imbalance prettier and harder to fix. Keep nodes labelled in plain words so future you understands the grade at a glance.
It is worth remembering that Black Magic Camera gives you control, not automatic quality. The app exposes the decisions a stock camera app would make for you, which means your judgement becomes part of the footage. grading in DaVinci Resolve is one of those judgements, and it improves quickly once you start reviewing your own clips with a critical eye.
In practice:
No two phone clips match automatically, because light changes between takes even when settings do not. Balance each clip to a neutral, honest version of the scene first, using the scopes rather than your eyes alone, since screens lie charmingly. Then match clips within a scene to each other before applying any look, so cuts stop announcing themselves through colour jumps the audience feels but cannot name.
Storage, battery and heat are the silent partners of every Black Magic Camera session. High quality recording consumes all three faster than new users expect, so plan for them alongside grading in DaVinci Resolve. A creator who manages the practical side finishes sessions with footage; a creator who ignores it finishes with a hot phone and a half-recorded scene.
Add the creative look on its own node and dial its strength down from full; most first grades are twenty percent too strong. Skin tones are your referee: if faces look sunburned, waxy or grey, the look is winning against the footage. Step away for five minutes and look again with fresh eyes, because grading fatigue is real and the export button has no undo once the client has the file.
When you share a finished video, nobody sees your settings, only the result. That is why grading in DaVinci Resolve deserves deliberate attention with Black Magic Camera: it is one of the invisible decisions that separate footage that merely documents a moment from footage that holds a viewer's attention. Test it on your next small project before trusting it on an important one.
Footage recorded flat, exposed carefully and white balanced deliberately grades beautifully in Resolve. Footage recorded with heavy in-phone looks, crushed exposure or mixed automatic settings fights every node. This is why the recording guides on this site insist on clean files: you are not making the phone footage look worse on the day, you are keeping every grading door open for the edit.
If you are learning Black Magic Camera in stages, keep a simple notebook of what worked. Note the scene, the light, the settings you chose for grading in DaVinci Resolve and how the clip looked afterwards. Within a few weeks the notebook becomes a personal preset library, written in your own experience, that no generic settings list can match.
Export for the destination, not for your ego: match the delivery resolution and frame rate to where the video will be watched, use the platform presets as a starting point, and always watch the exported file once, completely, before it leaves. The final watch catches the wrong audio track, the ungraded clip hiding in the timeline and the title typo, the three horsemen of the embarrassing delivery.
The same discipline applies whatever you are filming with Black Magic Camera. Decide the look before you press record, set the controls that create it, and check the result on a screen bigger than the phone as soon as you can. grading in DaVinci Resolve stops being a theory the first time you compare two test clips side by side and can see exactly what your settings changed.
Correct exposure and balance first, shape contrast and saturation second, apply the creative look third. Corrections before looks keeps every later decision honest.
Light changes between takes even when settings stay fixed. Balance each clip to a neutral version using scopes, then match clips within a scene before adding any look.
Usually less than full strength. Start with the look node dialled back, judge by skin tones, and re-check with fresh eyes after a break before exporting.
Match the destination: the resolution, frame rate and format of where the video will be watched. Then watch the exported file completely once before delivering it.
Grading Black Magic Camera footage in Resolve is a calm sequence: organise, balance, match, look, deliver. Keep corrections before creativity and restraint above all, and phone footage finishes like film.
When you share a finished video, nobody sees your settings, only the result. That is why grading in DaVinci Resolve deserves deliberate attention with Black Magic Camera: it is one of the invisible decisions that separate footage that merely documents a moment from footage that holds a viewer's attention. Test it on your next small project before trusting it on an important one.
The same discipline applies whatever you are filming with Black Magic Camera. Decide the look before you press record, set the controls that create it, and check the result on a screen bigger than the phone as soon as you can. grading in DaVinci Resolve stops being a theory the first time you compare two test clips side by side and can see exactly what your settings changed.
Download Black Magic Camera APK